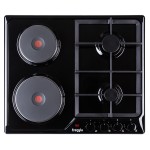
If you want to make repairs in your kitchen, then you can independently replace the stove with a hob. Today, a modern and functional solution for every kitchen is to install the hob in the worktop with your own hands. In addition, you can make a combination that will consist of an oven and a hob, so you do not lose anything at all. In this article, we will tell you in detail how to independently install the hob in the worktop, without the help of specialists.
How to cut a hole for the hob
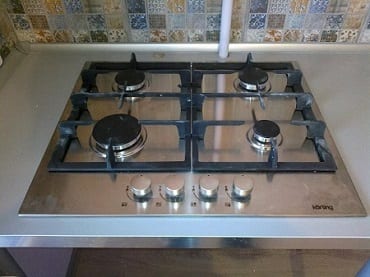
If you have ever had to do repairs in your dacha or in an apartment, or you have been engaged in construction, then correctly installing the hob in the countertop will be a simple matter for you. It is enough to accurately measure its thickness and dimensions during installation. Well, let's get started.
In order to properly install the hob yourself, you need to know how to cut a hole in the worktop. All the required sizes are noted in the instructions on the diagram, do not come up with anything new. So, you will speed up the process and significantly reduce the possible measurement errors. Measurements can be made independently, for this you need to put the hob from the bottom to the top, then find out the length and width of the surface on the sides inside.
Please note that the instructions write the minimum allowed indents from the edge of the tabletop. You can make the size of the indents a little larger, since the narrow edges may break after a while. It is necessary to make markings on the surface of the table in accordance with the dimensions and thickness of the hob. This is where you will embed it. To keep the lines visible and more noticeable on a dark surface, you can glue strips of paper tape, and transfer each line to them.
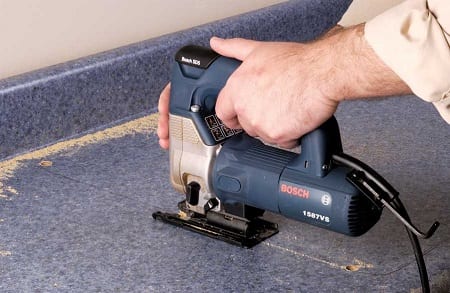
Then you need to drill the hole from which the cut begins. Cutouts are made with an electric jigsaw. To make the edges of the cutout even and not crumble at the edges, it is advisable to use a hand router, and to round the corners with a radius cutter, while each cut must be sanded. You can collect the resulting sawdust with a vacuum cleaner.
When you are finished with the hole, take your hob and make sure you cut it correctly. If you carefully cut the hole, the surface will easily fit into the resulting cutout.
![]() See also - Connecting the hob to the power supply yourself
See also - Connecting the hob to the power supply yourself
We seal and seal
Before installation, it is necessary to process the sections of the countertop with a silicone sealant or nitro varnish. So, you will protect the surface of the countertop from water, dirt stains, swelling and extend its service life. You can also use a seal for installation, since it glues itself and performs the same role.
The self-adhesive seal is placed on top, the edges of the surface should lie on it.You can also use aluminum tape for sealing, which, by the way, protects against temperature fluctuations. If the seal is of high quality, then the hole in the countertop will serve you longer, it will not need to be repaired or replaced.
Also, the installation differs depending on the type of panel - they are gas and electric, plus separate fastening characteristics. You can fasten the fastening parts with screws.
Installing and connecting electric hobs
Today's electrical panels are very functional, with correct surface installation, they rarely fail, therefore, they do not need repair work for a long period. When repairs are nevertheless needed, the panel quickly detaches and refers to the master on its own, or the repair can be done independently, thanks to which you save your money on calling a specialist.
Before installing the hob, place it on the worktop, turn it over and connect the wires according to the diagram. You can find the diagram on the back of the panel, this is done for your convenience. It is necessary to take into account not only its size, but its thickness. When you install and connect yourself, then take good care. If you connect the wires incorrectly, then you will not then adjust the burners and their heating value.
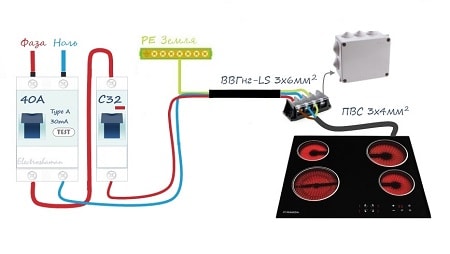
In the case when there is a special panel wire to connect the hob electrical panel, then you do not need either an outlet or a plug. It is enough to connect the panel to the wire. The connection of an induction hob follows the same principle.
![]() See also - DIY hob repair: major malfunctions
See also - DIY hob repair: major malfunctions
Installing and connecting gas hobs
When installing a gas hob with your own hands, you need to see the type of fastening. Do not forget about the thickness and dimensions of the hob. Then it must be installed, aligned along the edge of the tabletop, and then secured. As a rule, the kit includes brackets for fastening, they are located at the bottom. The electrical wire is plugged into an outlet.
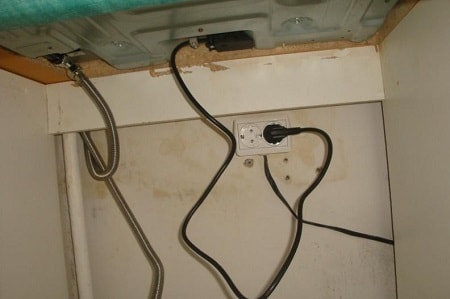
To connect a gas hob with your own hands, you need to carefully study the safety rules. The gas is shut off, after which the hob is connected with a flexible hose to the gas pipe. A paronite gasket must be placed in the nut. Then turn on the gas and the burners, check the hose connections so that there are no leaks. To do this, you need to soap all the joints, if the foam does not have bubbles, there are no leaks, the installation is done correctly. In addition, gas analyzers are used for testing.
If you do everything correctly, then there should be no problems installing the hob. The main thing is that you do not rush and do the job efficiently, taking into account all the nuances of installation.

